
Functional mailbox with Outlook 2016
A) Adding a functional mailbox as an additional mailbox
In Outlook, go to the menu:
- File
- Account settings
- Account settings...
- Select your Exchange account and click on "Change".
- Click on "More settings"
- Click on the "Advanced" tab.
- Click on the "Add" button.
- Enter the name of the function mailbox to be added, e.g. SCC function.
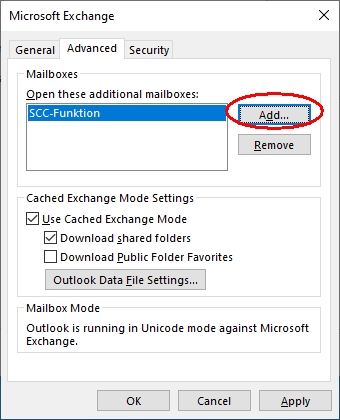
- Close all previously opened dialog boxes with "OK", "Next" and "Finish".
After confirming your settings, the added functional mailbox will appear in the Outlook folder list.
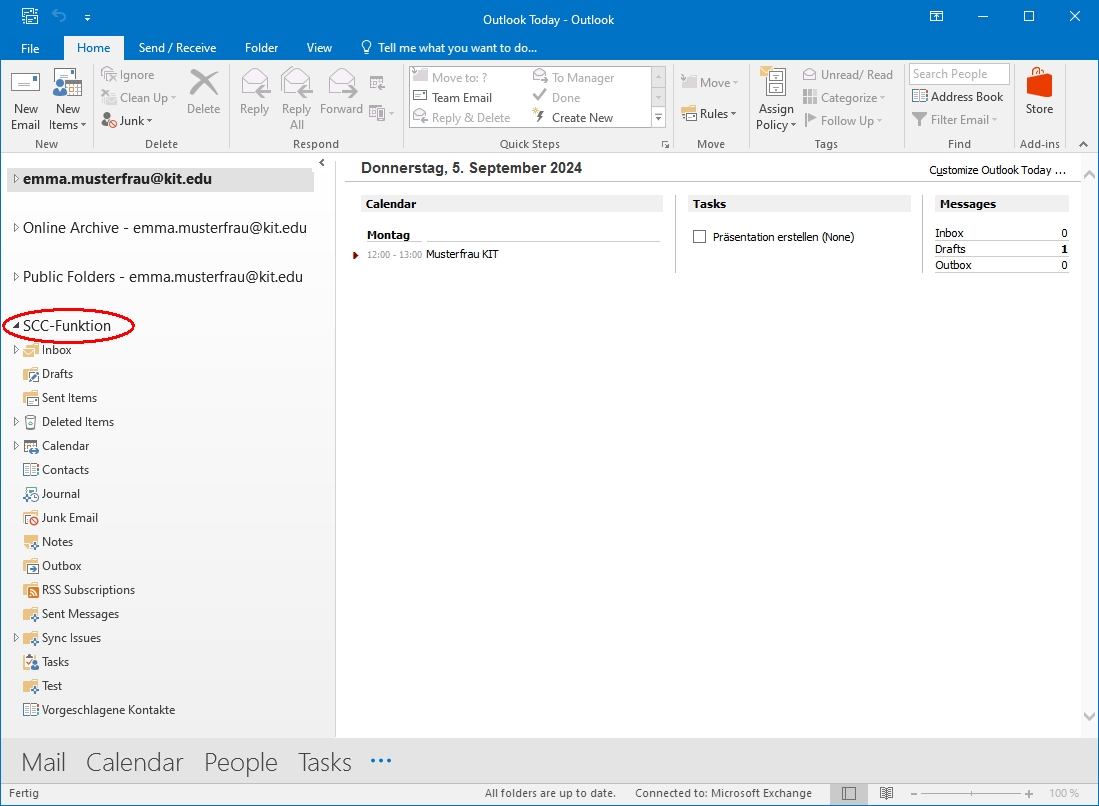
Adding the functional mailbox is complete.
To send under it, proceed as follows:
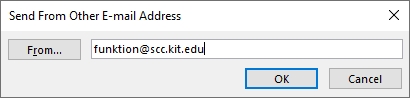
- Create a new message, e.g. with "Home - New Email".
- Show the From field via "Options - From".
- Click on the From field and select "Other e-mail address ...".
- Enter the desired sender address.
B) Adding a functional mailbox as an additional account
In Outlook, go to the menu:
- File
- Account settings
- Account settings...
- Stay on the "E-mail" tab and click on "New"
- Select "E-mail account" and enter the following data:
- E-mail address: Email address of the function mailbox, e.g. function∂scc kit edu
- Leave all other fields blank
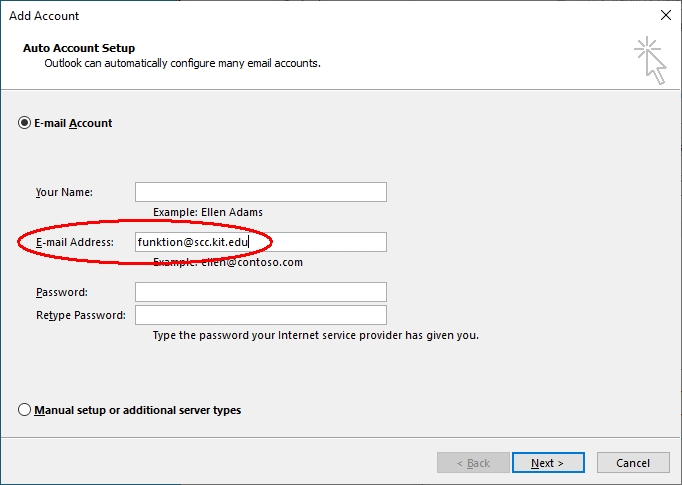
- Click on "Next"
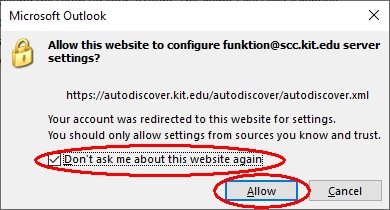
- If you receive the message "Allow this website to configure <function mailbox email address> server settings?", enable the option "Don't ask me about this webiste again" and click on "Allow".
- If a login window appears, enter the following data:
- User name: Your KIT account
- Employees: <ab1234>∂kit.edu
- Students: <uxxxx>∂student.kit.edu
- Guests and partners: <ab1234>∂partner.kit.edu
- Password: Your corresponding password
- User name: Your KIT account
- Click on Finish
- Restart Outlook
The added functional mailbox now appears in Outlook in the Outlook folder list.

Adding the functional mailbox is complete.
To send under it, proceed as follows:
- If you create the new message in the mailbox of the functional mailbox, the functional mailbox is automatically entered as the sender.
- Otherwise, create a new message, e.g. with "Home - New Email".
- Click on the From field and select the account with the functional mailbox.